  Browse to and select the enterprise license file to upgrade the HoloLens edition.You can also toggle Yes or No to hide parts of the first experience.To set up the device without the need to connect to a Wi-Fi network, toggle Skip Wi-Fi setup to On.Select a region and timezone in which the device will be used. Browse to and select the enterprise license file to upgrade the HoloLens edition.You can also toggle Yes or No to hide parts of the first experience.To set up the device without the need to connect to a Wi-Fi network, toggle Skip Wi-Fi setup to On.Select a region and timezone in which the device will be used. | 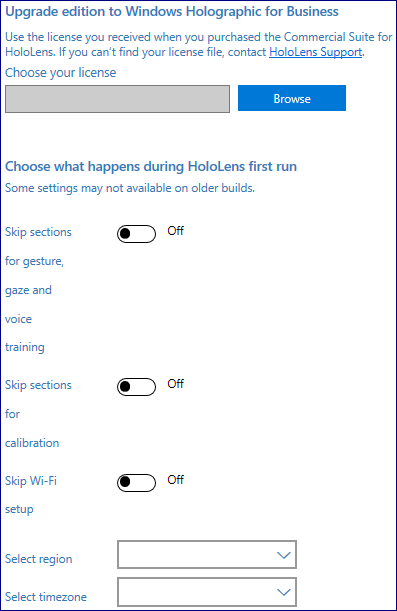 |
  In this section, you can enter the details of the Wi-Fi wireless network that the device should connect to automatically. To do this, select On, enter the SSID, the network type (Open or WPA2-Personal), and (if WPA2-Personal) the password for the wireless network. In this section, you can enter the details of the Wi-Fi wireless network that the device should connect to automatically. To do this, select On, enter the SSID, the network type (Open or WPA2-Personal), and (if WPA2-Personal) the password for the wireless network. | 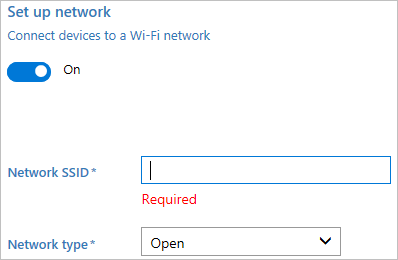 |
  You can enroll the device in Azure Active Directory, or create a local account on the deviceBefore you use a Windows Configuration Designer wizard to configure bulk Azure AD enrollment, set up Azure AD join in your organization. The maximum number of devices per user setting in your Azure AD tenant determines how many times the bulk token that you get in the wizard can be used. To enroll the device in Azure AD, select that option and enter a friendly name for the bulk token you will get using the wizard. Set an expiration date for the token (maximum is 30 days from the date you get the token). Click Get bulk token. In the Let's get you signed in window, enter an account that has permissions to join a device to Azure AD, and then the password. Click Accept to give Windows Configuration Designer the necessary permissions. To create a local account, select that option and enter a user name and password. Important: (For Windows 10, version 1607 only) If you create a local account in the provisioning package, you must change the password using the Settings app every 42 days. If the password is not changed during that period, the account might be locked out and unable to sign in. You can enroll the device in Azure Active Directory, or create a local account on the deviceBefore you use a Windows Configuration Designer wizard to configure bulk Azure AD enrollment, set up Azure AD join in your organization. The maximum number of devices per user setting in your Azure AD tenant determines how many times the bulk token that you get in the wizard can be used. To enroll the device in Azure AD, select that option and enter a friendly name for the bulk token you will get using the wizard. Set an expiration date for the token (maximum is 30 days from the date you get the token). Click Get bulk token. In the Let's get you signed in window, enter an account that has permissions to join a device to Azure AD, and then the password. Click Accept to give Windows Configuration Designer the necessary permissions. To create a local account, select that option and enter a user name and password. Important: (For Windows 10, version 1607 only) If you create a local account in the provisioning package, you must change the password using the Settings app every 42 days. If the password is not changed during that period, the account might be locked out and unable to sign in. | 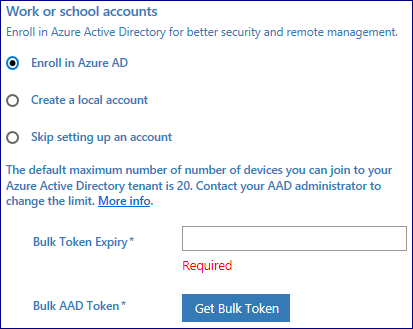 |
  To provision the device with a certificate, click Add a certificate. Enter a name for the certificate, and then browse to and select the certificate to be used. To provision the device with a certificate, click Add a certificate. Enter a name for the certificate, and then browse to and select the certificate to be used. | 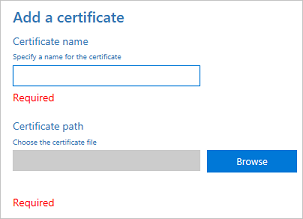 |
  Toggle Yes or No to enable Developer Mode on the HoloLens. Learn more about Developer Mode. Toggle Yes or No to enable Developer Mode on the HoloLens. Learn more about Developer Mode. | 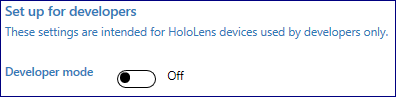 |
  Do not set a password to protect your provisioning package. If the provisioning package is protected by a password, provisioning the HoloLens device will fail. Do not set a password to protect your provisioning package. If the provisioning package is protected by a password, provisioning the HoloLens device will fail. | 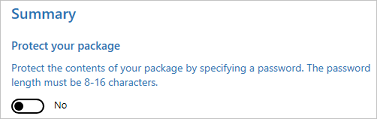 |
After you're done, click **Create**. It only takes a few seconds. When the package is built, the location where the package is stored is displayed as a hyperlink at the bottom of the page.
**Next step**: [How to apply a provisioning package](#apply)
## Create a provisioning package for HoloLens using advanced provisioning
>[!NOTE]
>Settings in a provisioning package will only be applied if the provisioning package includes an edition upgrade license to Windows Holographic for Business or if [the device has already been upgraded to Windows Holographic for Business](hololens1-upgrade-enterprise.md).
1. On the Windows Configuration Designer start page, select **Advanced provisioning**.
2. In the **Enter project details** window, specify a name for your project and the location for your project. Optionally, enter a brief description to describe your project.
3. Click **Next**.
4. In the **Choose which settings to view and configure** window, select **Windows 10 Holographic**, and then click **Next**.
6. Click **Finish**.
7. Expand **Runtime settings** and customize the package with any of the settings [described below](#what-you-can-configure).
>[!IMPORTANT]
>(For Windows 10, version 1607 only) If you create a local account in the provisioning package, you must change the password using the **Settings** app every 42 days. If the password is not changed during that period, the account might be locked out and unable to sign in. If the user account is locked out, you must [perform a full device recovery](https://developer.microsoft.com/windows/mixed-reality/reset_or_recover_your_hololens#perform_a_full_device_recovery).
8. On the **File** menu, click **Save**.
4. Read the warning that project files may contain sensitive information, and click **OK**.
>[!IMPORTANT]
>When you build a provisioning package, you may include sensitive information in the project files and in the provisioning package (.ppkg) file. Although you have the option to encrypt the .ppkg file, project files are not encrypted. You should store the project files in a secure location and delete the project files when they are no longer needed.
3. On the **Export** menu, click **Provisioning package**.
4. Change **Owner** to **IT Admin**, which will set the precedence of this provisioning package higher than provisioning packages applied to this device from other sources, and then select **Next**.
5. Set a value for **Package Version**.
>[!TIP]
>You can make changes to existing packages and change the version number to update previously applied packages.
6. On the **Select security details for the provisioning package**, click **Next**.
>[!WARNING]
>If you encrypt the provisioning package, provisioning the HoloLens device will fail.
7. Click **Next** to specify the output location where you want the provisioning package to go once it's built. By default, Windows Configuration Designer uses the project folder as the output location.
Optionally, you can click **Browse** to change the default output location.
8. Click **Next**.
9. Click **Build** to start building the package. The project information is displayed in the build page and the progress bar indicates the build status.
10. When the build completes, click **Finish**.