
imagewebp(): Palette Image Not Supported by Webp
Tail your NGINX website error log
tail -n 100 -f /var/log/nginx/yournginxsite.error.log | grep errorError log
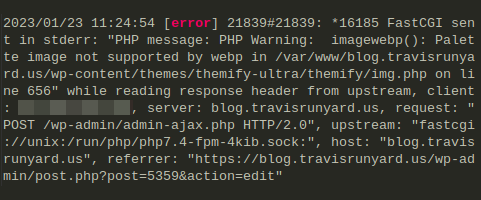
Running wordpress using the themify-ultra theme if you see the following NGINX PHP webp error in your sites error log, continue reading for the fix:
FastCGI sent in stderr: "PHP message: PHP Warning: imagewebp(): Palette image not supported by webp in /themify-ultra/themify/img.php on line 656 while reading response header from upstream, client: x.x.x.x, server: domain.com, request: "POST /wp-admin/async-upload.php HTTP/2.0", upstream: "fastcgi://unix:/run/php/php7.4-fpm-4kib.sock:", host: "domain.com", referrer: "https://domain.com/wp-admin/post.php?post=5359&action=edit"
The Fix
Put this code at the end of your theme or child themes functions.php file (wp-content/themes/themify-ultra/functions.php or wp-content/themes/themify-ultra/custom-functions.php) and your problem will be solved:
//** *Enable upload for webp image files.*/
function webp_upload_mimes($existing_mimes) {
    $existing_mimes['webp'] = 'image/webp';
    return $existing_mimes;
}
add_filter('mime_types', 'webp_upload_mimes');
I can confirm this fixed the problem with the themify-ultra wordpress theme.
I found the solution as the bottom answer here stackoverflow.com/questions/53427169/how-to-upload-webp-image-in-wordpress.
NGINX Webp Prerequisite Configuration
Enable WebP on Nginx Servers
WebP is an image format developed by Google that can optimize image file size by 60-80% without losing the image quality. All Themify themes come with the WebP image feature. To enable WebP image, go to Themify > Settings > Performance. If you are using Nginx server, the WebP image option might be greyed out. Follow the steps below to enable WebP on Nginx.
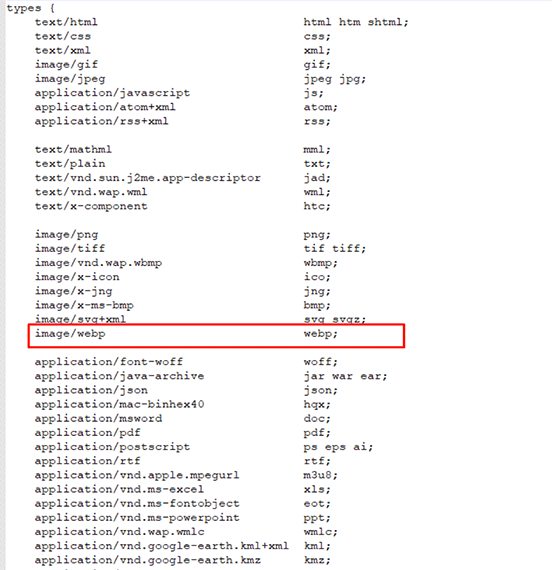
Step 1) Make sure mime.types includes webp support.
The mime-types file is normally located at:
/etc/nginx/mime.types
Open mime-types and check if it includes image/webp webp;
If you don’t see it, add it.
Step 2) Download and extract the webp-nginx.zip, you should have 2 folders: ‘conf.d’ and ‘snippets’. Upload ‘conf.d’ and ‘snippets’ folders to ‘/etc/nginx’ folder.
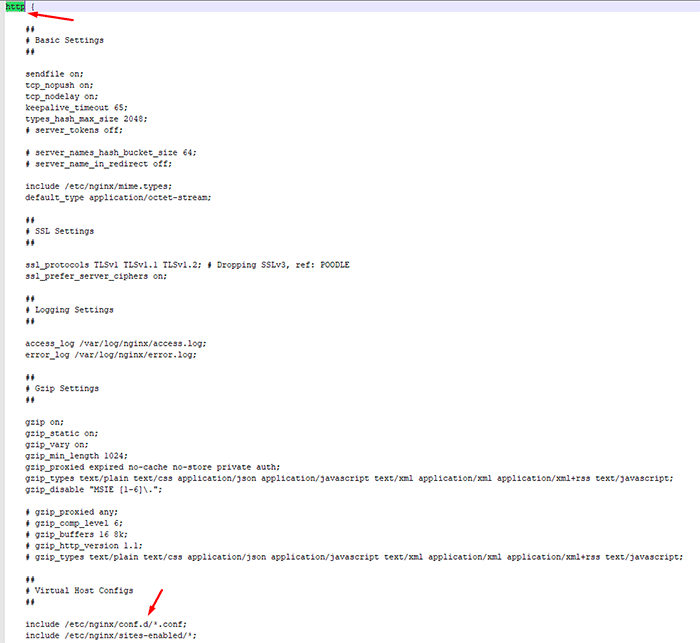
Step 3) Check if nginx.conffile has include /etc/nginx/conf.d/*.conf;
Normally the nginx.conf file is located at /etc/nginx/nginx.conf
If you can’t find it there, try the following location:
/usr/local/nginx/conf/nginx.conf
or
/usr/local/etc/nginx/nginx.conf
Open nginx.conf file and check if it has this line:
include /etc/nginx/conf.d/*.conf;
If it doesn’t have it, add it.
Step 4) Then you need to insert the following in the server context of your configuration file (usually found in /etc/nginx/sites-available/ folder).
/etc/nginx/site-availables/xxx.conf (where xxx is the application name on your server).
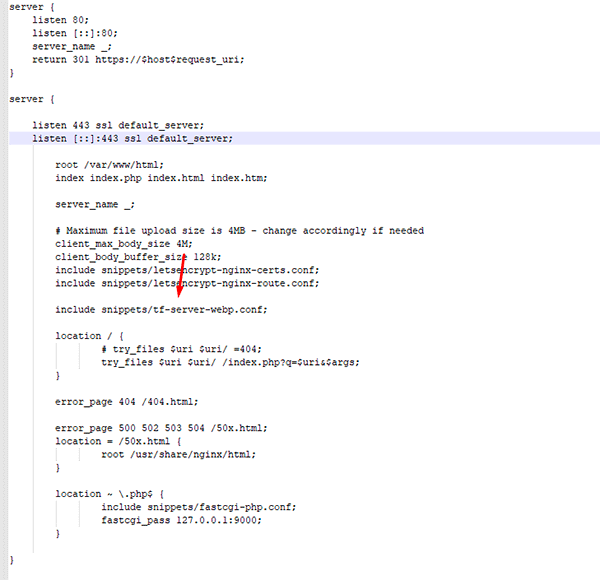
Example: if your application name is wordpress, you would see something like the screenshot below. If you are not sure which one is your application name, go to /etc/nginx/sites-enabled/ folder, there should be a .conf file with your application name. If you can’t find your site .conf file in the ‘sites-available’ folder, try to edit the ‘default’ file.
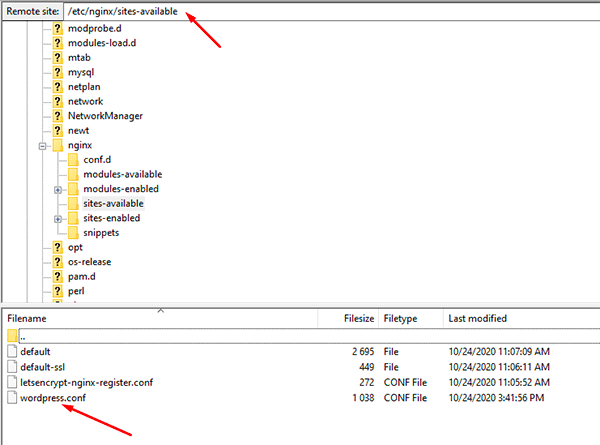
Edit the conf file in sites-available folder and add this line:
include snippets/tf-server-webp.conf;
Step 5) Reload or restart server
# nginx sanity check
nginx -t

# reload nginx
nginx -s reload

# or restart nginx service with systemd
systemctl restart nginx
If you have any questions/comments regarding this article, click here or scroll down below (login isn't required to post comments and there's no waiting period).
